QuoTracT Blog
How to Properly Tile a Bathroom Floor (The Professional Way)
Learn step-by-step how to tile your bathroom floor like a pro using modern tools and techniques.
Tiling a bathroom floor is more than just setting tiles in place — it’s a system. Proper preparation, correct materials, and patience are what separate a floor that lasts decades from one that cracks within a year.
Step 1: Surface Preparation (The Most Critical Step) Before any tile is installed, the subfloor must be:
Clean (free of dust, grease, and debris)
Structurally sound
Flat and level within tolerance Wood subfloors often require reinforcement to prevent flexing, which is one of the main causes of cracked tiles and grout failures.
Step 2: Crack Isolation & Waterproofing (Don’t Skip This) To prevent tiles from cracking due to movement, temperature changes, or minor structural shifts, a crack isolation or uncoupling membrane should be installed. Products such as Schluter® Ditra, Ditra-Heat, or similar membranes provide:
Crack isolation
Waterproofing
Better load distribution Mortar Selection for Membranes This step is often done incorrectly. Over plywood: use a modified thinset mortar
Over concrete: follow manufacturer recommendations (often unmodified) Because membranes like Ditra are made of plastic, they do not absorb moisture, so curing time is longer. ⏱️ Always allow extra curing time before setting tile — rushing this step can compromise the bond.
Step 3: Tile Layout & Planning A professional installation always starts with a dry layout:
Center lines are established
Cuts are balanced on opposite walls
Small sliver cuts are avoided whenever possible This step ensures a clean, symmetrical finish and avoids awkward-looking edges.
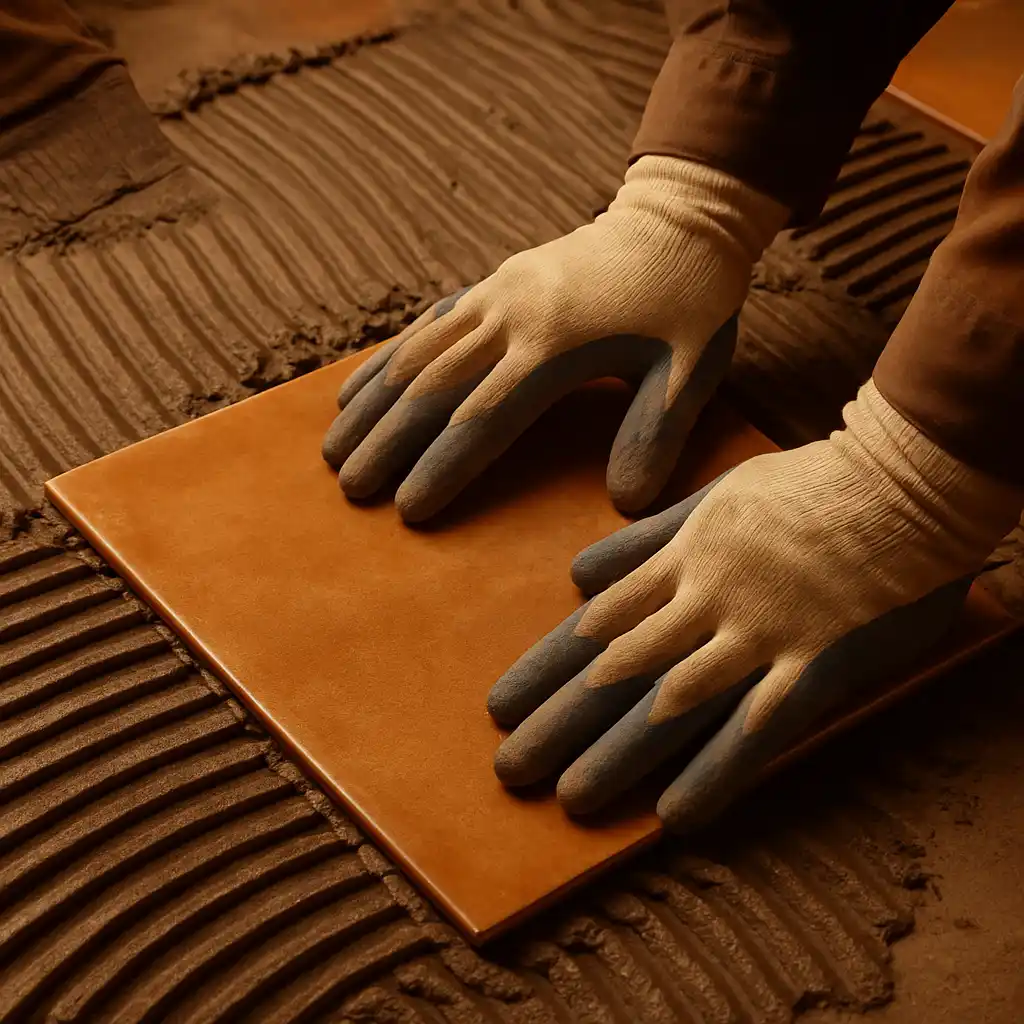
Step 4: Setting the Tile (Right Mortar Matters) Tile should be installed using the correct thinset based on:
Tile size
Tile material (porcelain, ceramic, stone)
Substrate type Large-format tiles require large-format or medium-bed mortar to ensure proper coverage and prevent hollow spots. Spacers help maintain consistent grout lines, and tiles must be checked regularly for level and alignment.
Step 5: Curing Time (Patience Pays Off) Once tiles are set:
Allow at least 24–48 hours before walking on the surface
Longer curing may be required when installing over membranes Rushing this step can cause tile movement, weak bonds, or future failures.
Step 6: Grouting & Final Sealing After curing:
Grout joints carefully
Clean haze properly
Apply sealer if required (depending on grout type) This final step protects the installation and gives the floor its finished look.
Final Thoughts A properly tiled bathroom floor is not just about aesthetics — it’s about longevity. Using the right products, allowing proper curing time, and following professional installation methods ensures a floor that performs as good as it looks. Happy tiling 🧱✨